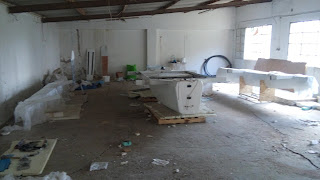
Μετά από πολύ δουλειά έφτασε η κρίσιμη ώρα του μονταρίσματος του σκάφους, δλδ η σύνδεση των πλωτήρων στο κεντρικό σκάφος. Φυσικά υπήρχε ένα σχετικό άγχος γιατί ήταν η τελευταία εργασία και η πιο σοβαρή. Ευτυχώς το τρόλεϊ των πλωτήρων ήταν το κλειδί της επιτυχίας. Χάρη σ'αυτό μπόρεσα και έκανα τις συνδέσεις με μεγάλη ακρίβεια και σχετικά εύκολα.
Δοκίμασα και την αναδίπλωση τους και όλα πήγαν θαυμάσια. Έφτιαξα νέα ταμπούκια στο χώρο της καρίνας και φιλετάρισα με εποξικό στόκο τις γωνίες εσωτερικά και έβαψα με 3 χέρια αστάρι.
Επίσης πρόσθεσα και ένα τρίφωτο φανό ναυσιπλοΐας που λειτουργεί με μπαταρία, ο οποίος είναι αποσπώμενος και αναδιπλούμενος. Φυσικά τον έφτιαξα μόνος μου με την βοήθεια του Fusion 360 και του 3D printer.
Τα αυτοκόλλητα που επέλεξα είναι κοπτικά βινυλίου 7 ετών σε γκρι σκούρο.
Επίσης έκανα ψυχρό γαλβάνισμα σε κάποια μέρη του τρέιλερ που είχα σκουριά και πέρασα καινούρια σφουγγάρια με επένδυση PVC στα μπράτσα στήριξης.
Το σκάφος είναι πλέον έτοιμο για ταξίδι.
After a lotl of work, the critical time of the boat was reached, including the connection of the floats to the central hull. Of course there was a relative stress because it was the last job and the most serious. Luckily the trolley for the floats was the key to success. Thanks to this I was able to make connections very accurately and relatively easily.
I tried and folded them and everything went great. I made new hatches in the DB space and I filleted with epoxy putty the corners inside and I paint a 3-layers primer.
I also added a battery operated navigation lights in tripod, which is detachable and foldable. Of course I made it myself with the help of Fusion 360 and 3D printer.
The stickers I chose are 7 year lasting vinyl cutters in dark gray.
I also made cold galvanizing in some parts of the trailer that I had rust and I install new PVC-coated sponges on the support arms.
The boat is now ready to hit the water.


